How to Add next-intl Internationalization to Next.js 15: Step-by-Step Guide
Step-by-step tutorial on integrating next-intl for internationalization in a Next.js 15 project.

Internationalization (i18n) is essential for modern web apps. With Next.js 15, the recommended way to add i18n is using next-intl
. In this guide, you'll learn how to set up next-intl
in a Next.js 15 project with a working, real-world approach.
1. Install next-intl
First, install the package:
npm install next-intl
2. Configure Routing
Create a routing config to define your supported locales. In Aniq-UI, this is done in src/i18n/routing.ts
:
1// src/i18n/routing.ts
2import {defineRouting} from 'next-intl/routing';
3
4export const routing = defineRouting({
5 locales: ['en', 'fr', 'ar', 'es'],
6 defaultLocale: 'en'
7});
3. Add Navigation Helpers
Set up navigation helpers in src/i18n/navigation.ts
:
// src/i18n/navigation.ts
import { createNavigation } from 'next-intl/navigation';
import { routing } from './routing';
export const { Link, redirect, usePathname, useRouter, getPathname } = createNavigation(routing);
4. Load Messages on the Server
Configure message loading in src/i18n/request.ts
:
1// src/i18n/request.ts
2import { getRequestConfig } from 'next-intl/server';
3import { hasLocale } from 'next-intl';
4import { routing } from './routing';
5
6export default getRequestConfig(async ({ requestLocale }) => {
7 const requested = await requestLocale;
8 const locale = hasLocale(routing.locales, requested)
9 ? requested
10 : routing.defaultLocale;
11
12 const [seoMessages] = await Promise.all([
13 import(`../messages/seo/${locale}.json`).then(module => module.default).catch(() => ({})),
14 ]);
15
16 return {
17 locale,
18 messages: {
19 seo: seoMessages,
20 }
21 };
22});
5. Provide Messages to Your App
Wrap your pages with NextIntlClientProvider
. For example, in src/app/[locale]/about/layout.tsx
:
1// src/app/[locale]/about/layout.tsx
2import { NextIntlClientProvider } from "next-intl";
3
4export default async function AboutLayout({
5 children,
6 params,
7}: {
8 children: React.ReactNode;
9 params: Promise<{ locale: string }>;
10}) {
11 const { locale } = await params;
12
13 const [about] = await Promise.all([
14 import(`@/messages/about/${locale}.json`).then((mod) => mod.default),
15 ]);
16
17 const messages = { about };
18 return (
19 <NextIntlClientProvider locale={locale} messages={messages}>
20 {children}
21 </NextIntlClientProvider>
22 );
23}
6. Organize Your Message Files
Store your translation files in src/messages/
, e.g.:
src/messages/about/en.json
src/messages/about/fr.json
src/messages/about/ar.json
src/messages/about/es.json
Each file contains translations for a namespace, e.g.:
{
"header_story": "Our Story",
"header_title1": "We're Building",
// ...
}
7. Use Translations in Components
Use the useTranslations
hook from next-intl
:
1import { useTranslations } from "next-intl";
2
3export default function AboutHeader() {
4 const t = useTranslations("about");
5 return <h1>{t("header_title1")}</h1>;
6}
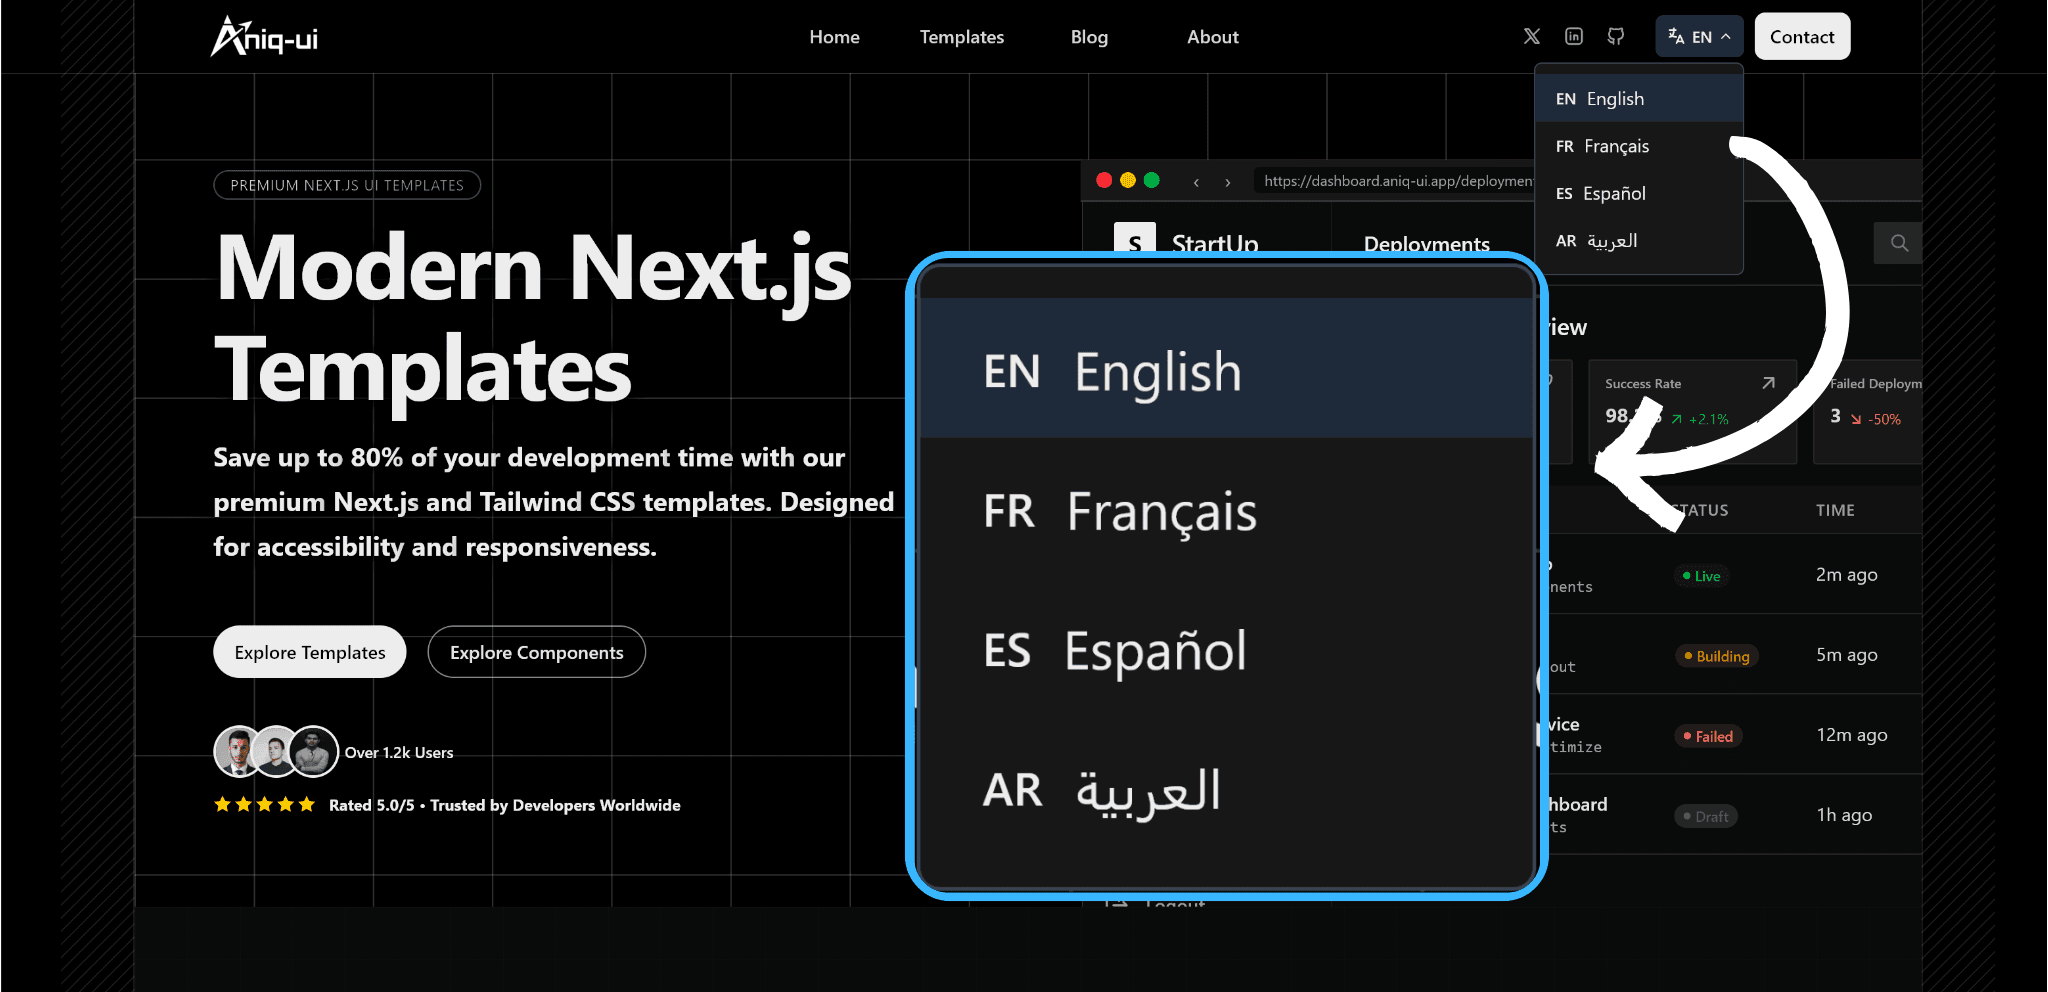
8. Add a Language Switcher
Here is the full code for the src/components/LanguageSelector/index.tsx
component used in Aniq-UI:
1// filepath: src/components/LanguageSelector/index.tsx
2"use client";
3
4import React, { useState, useRef, useEffect } from "react";
5import { useParams, useRouter } from "next/navigation";
6import { cn } from "@/lib/utils";
7import { IconLanguage, IconChevronDown } from "@/lib/icons";
8
9interface Language {
10 code: string;
11 name: string;
12 rtl: boolean;
13}
14
15const languages: Language[] = [
16 { code: "en", name: "English", rtl: false },
17 { code: "fr", name: "Franรงais", rtl: false },
18 { code: "es", name: "Espaรฑol", rtl: false },
19 { code: "ar", name: "ุงูุนุฑุจูุฉ", rtl: true },
20];
21
22export default function LanguageSelector() {
23 const [isOpen, setIsOpen] = useState(false);
24 const dropdownRef = useRef<HTMLDivElement>(null);
25 const router = useRouter();
26 const params = useParams();
27 const currentLocale = typeof params.locale === "string" ? params.locale : "en";
28
29 const currentLanguage = languages.find((lang) => lang.code === currentLocale) || languages[0];
30
31 useEffect(() => {
32 const handleClickOutside = (event: MouseEvent) => {
33 if (
34 dropdownRef.current &&
35 !dropdownRef.current.contains(event.target as Node)
36 ) {
37 setIsOpen(false);
38 }
39 };
40
41 document.addEventListener("mousedown", handleClickOutside);
42 return () => {
43 document.removeEventListener("mousedown", handleClickOutside);
44 };
45 }, []);
46
47 const changeLanguage = (langCode: string) => {
48 const currentPath = window.location.pathname;
49 // Extract the path after the locale segment
50 const pathSegments = currentPath.split('/');
51 pathSegments[1] = langCode; // Replace the locale segment
52
53 const newPath = pathSegments.join('/');
54 router.push(newPath);
55 setIsOpen(false);
56 };
57
58 return (
59 <div className="relative" ref={dropdownRef}>
60 <button
61 onClick={() => setIsOpen(!isOpen)}
62 className="flex items-center cursor-pointer px-2 py-2 rounded-md hover:bg-gray-100 dark:hover:bg-gray-800 text-sm"
63 aria-expanded={isOpen}
64 aria-haspopup="true"
65 >
66 <IconLanguage className="w-4 h-4 mr-1" />
67 <span className="font-medium text-xs mr-1">{currentLanguage.code.toUpperCase()}</span>
68 <IconChevronDown className={cn("w-3 h-3 transition-transform", isOpen ? "rotate-180" : "")} />
69 </button>
70
71 {isOpen && (
72 <div className="absolute z-50 mt-1 bg-white dark:bg-neutral-900 border border-gray-200 dark:border-gray-700 rounded-md shadow-lg py-1 w-40 min-w-max right-0">
73 <ul className="py-1">
74 {languages.map((language) => (
75 <li key={language.code}>
76 <button
77 onClick={() => changeLanguage(language.code)}
78 className={cn(
79 "w-full text-left cursor-pointer px-4 py-2 text-sm hover:bg-gray-100 dark:hover:bg-gray-800 flex items-center",
80 language.code === currentLocale && "bg-gray-100 dark:bg-gray-800"
81 )}
82 >
83 <span className="inline-block me-2 w-max font-medium text-xs">{language.code.toUpperCase()}</span>
84 {language.name}
85 </button>
86 </li>
87 ))}
88 </ul>
89 </div>
90 )}
91 </div>
92 );
93}
9. Test Your Setup
Start your dev server and visit /en/about
, /fr/about
, etc. You should see the correct translations and be able to switch languages.
Conclusion
With next-intl
, adding internationalization to Next.js 15 is straightforward and powerful. For a full working example, explore the Aniq-UI repository.
References: